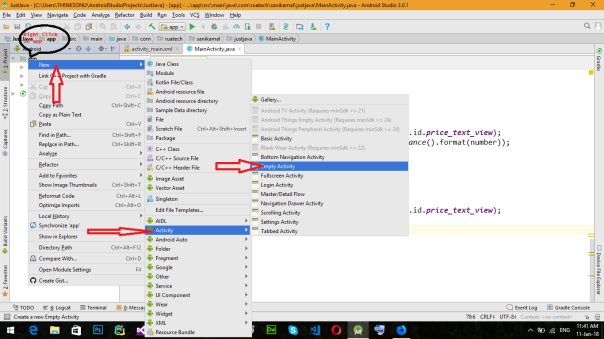
Step 1: Firstly, right-click the app folder and select New > Activity and choose your Activity as per requirement. Here I choose Login Activity as shown in figure below.
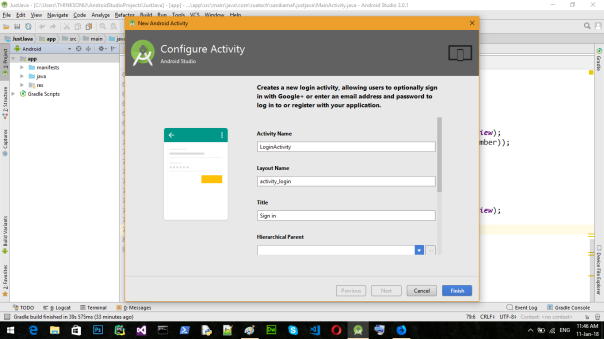
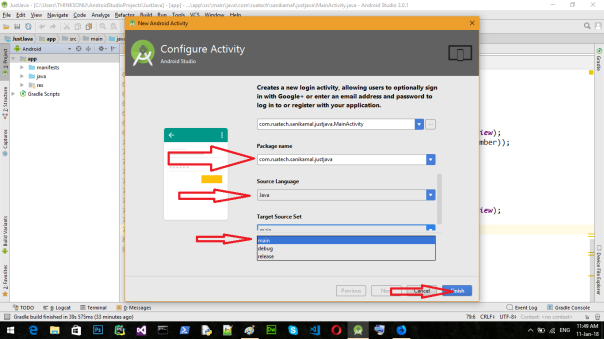
Step 2: After that Customize the Activity in Android Studio. Enter the “Activity Name”, “Layout Name”, “Title” ,”Hierarchical Parent”, “Package name”,”Source Language” and “Target Source Set ” in the Text box and Click on Finish button.
Note: Default configuration works fine.
All steps are shown in figure in below:
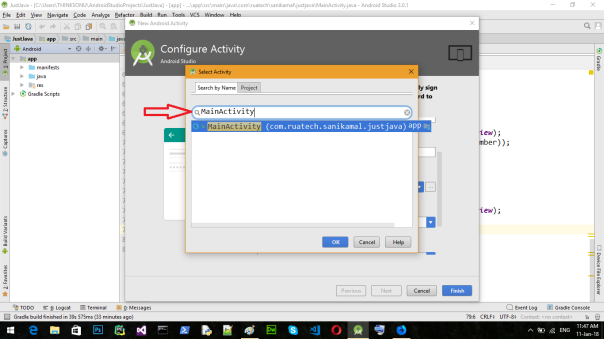
To configure Hierarchical parent click on right three doted button. Here I choose MainActivity but you can choose as your requirement.
If you want to write program in kotlin click Source Language and set to kotlin. Default source language is Java in android Studio 3.
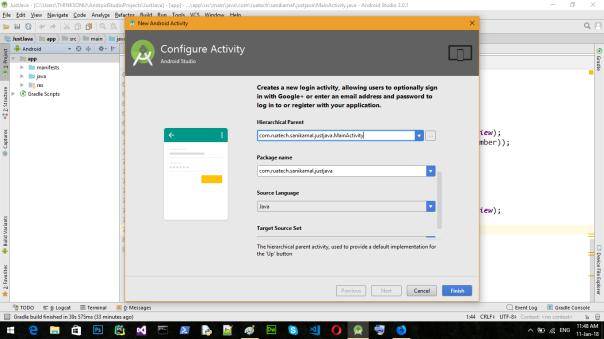

To set Target Source Set click on target source set It will show three option.By default it set to main in android studio 3.
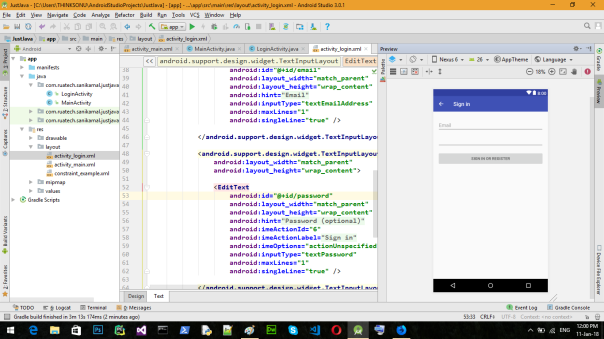
Step 3: After that your new Activity in Layout will be created. Your XML Code is in Text and your Design Output is in Design. See below figure.

1 thought on “Add a new activity to an existing project in Android Studio”